NO-Normal-EF and NO-Normal-EF-2D
PMK-NO-EF • Measuring heads for automated measurement
The special geometry of the measuring heads with insertion chamfers prevents sticking. Also used with our ZH-PMK centering holders.
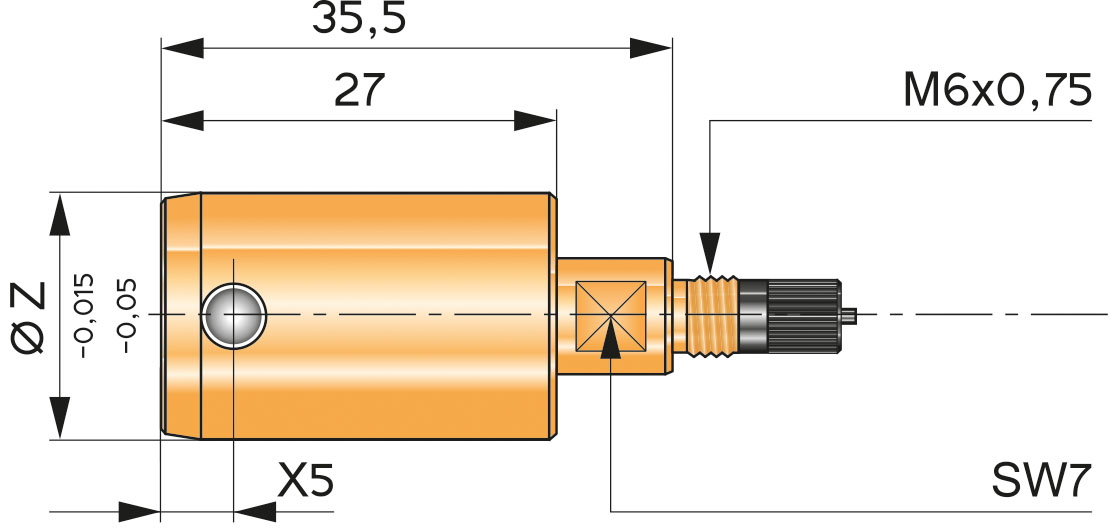
PMK-NO-02-EF · Measuring head for automated meas.
delivered with standard X dimension of 5mm and M6x0.75 thread. Repeat accuracy at IT 8 < 1µ. The measurement range is 0.15mm and can be extended to up to 0.6mm upon request. Self-centering, with insertion chamfer. Specify the smallest hole dimension when ordering.
Ordering example: øworkpiece = 18H7 = PMK-NO-02-EF-18
|
PMK-NO-02-EF_10-20mm |
|
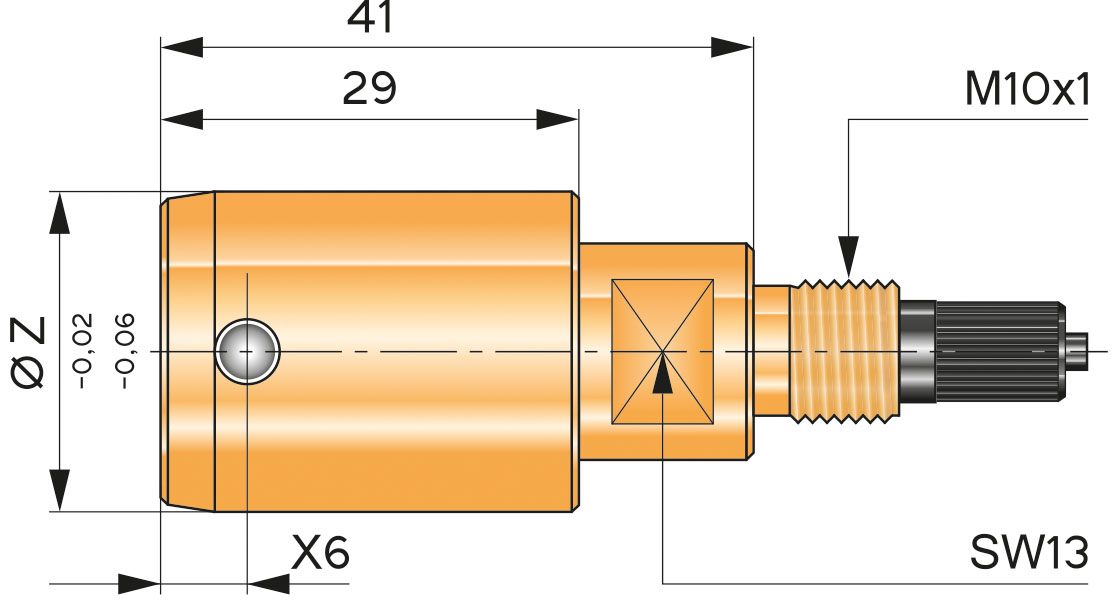
PMK-NO-03-EF · Measuring head for automated meas.
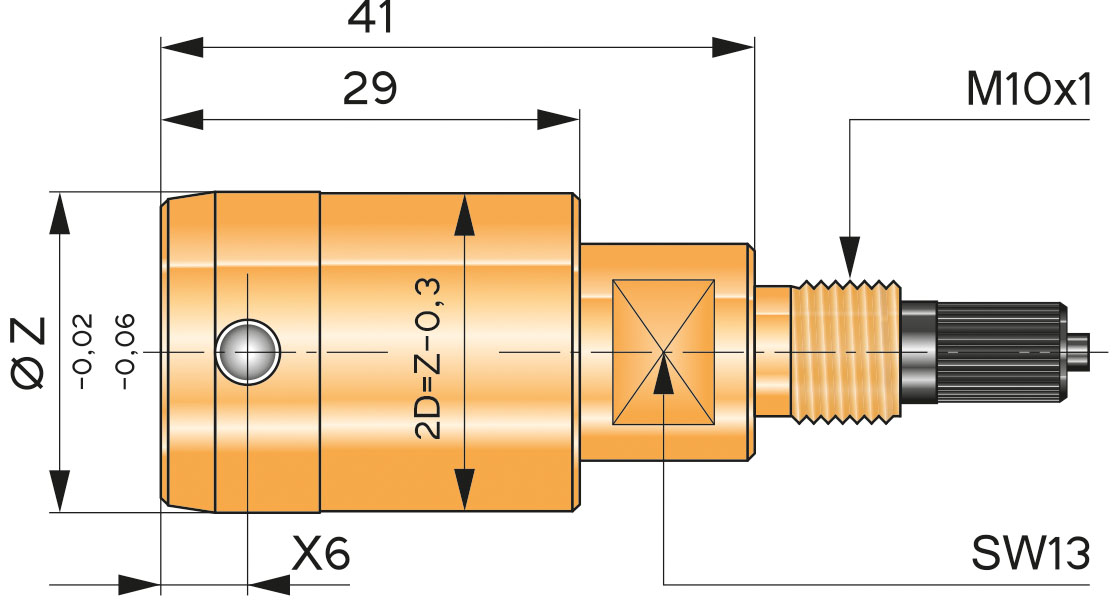
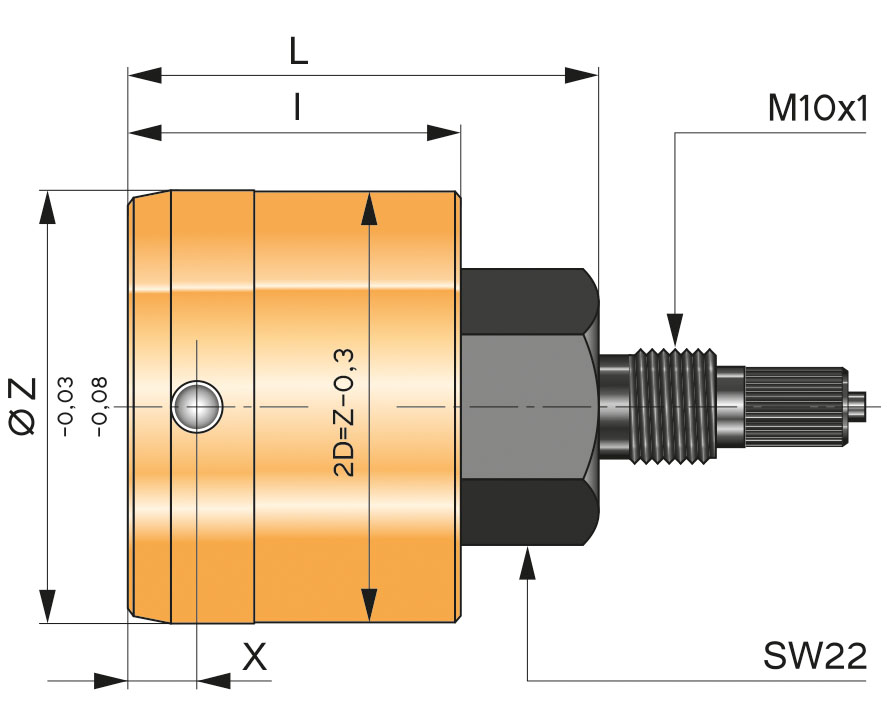
delivered with standard X dimension of 6mm and M10x1 thread. Repeat accuracy at IT 8 < 1µ. The measurement range is 0.2mm and can be extended to up to 0.8mm upon request. Self-centering, with insertion chamfer. Specify the smallest hole dimension when ordering.
Ordering example: øworkpiece = 38H7 = PMK-NO-03-EF-38
|
PMK-NO-03-EF_15-40mm |
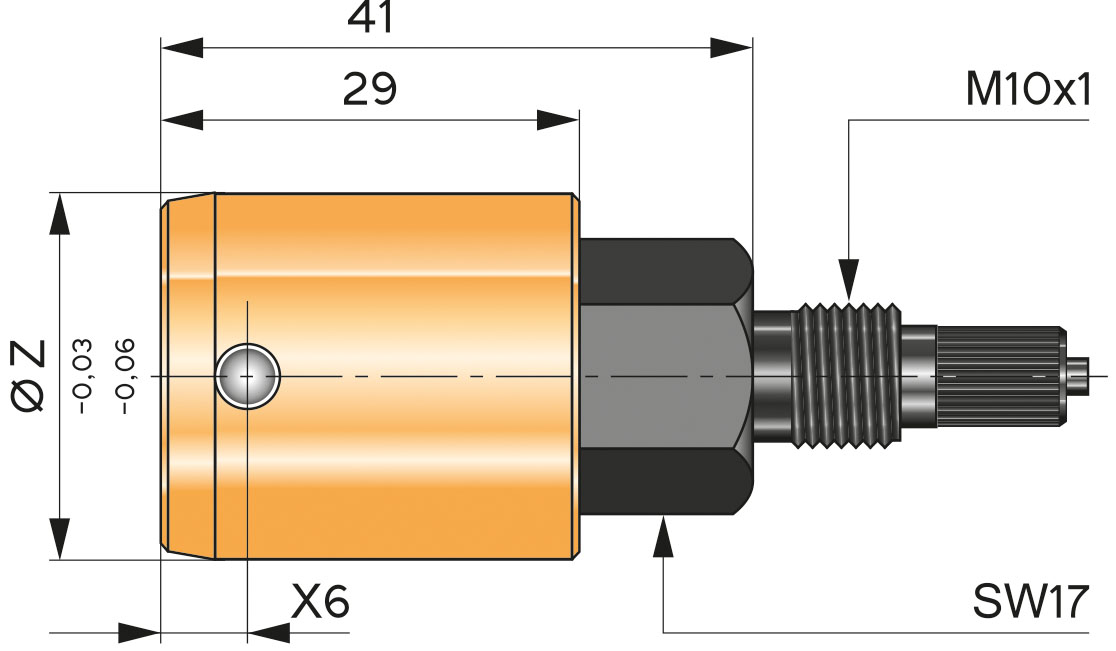 PMK-NO-03-EF_40-50mm |
|
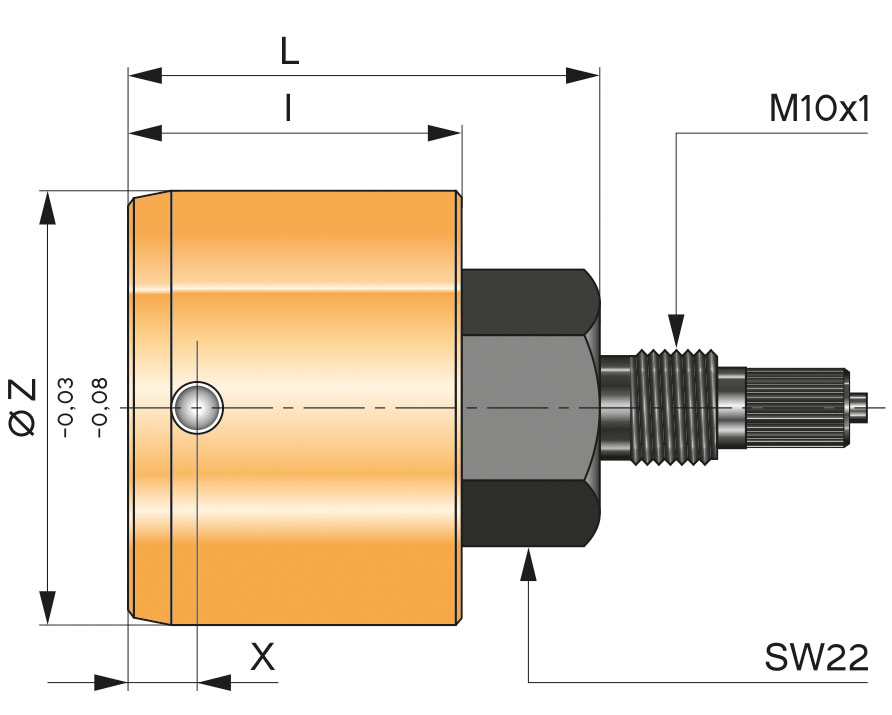
PMK-NO-03-EF_50-280mm |
Angle pieces for measuring heads are available for PMK-02 with M6x0.75 threads and for PMK-03 with M10x1 mm.
NO-02-EF-2D
PMK-NO-EF-2D • Measuring heads for automated measuring
The special geometry of meas. heads with insertion chamfer and 2-zone diameter prevent sticking, even for deeper measurements.
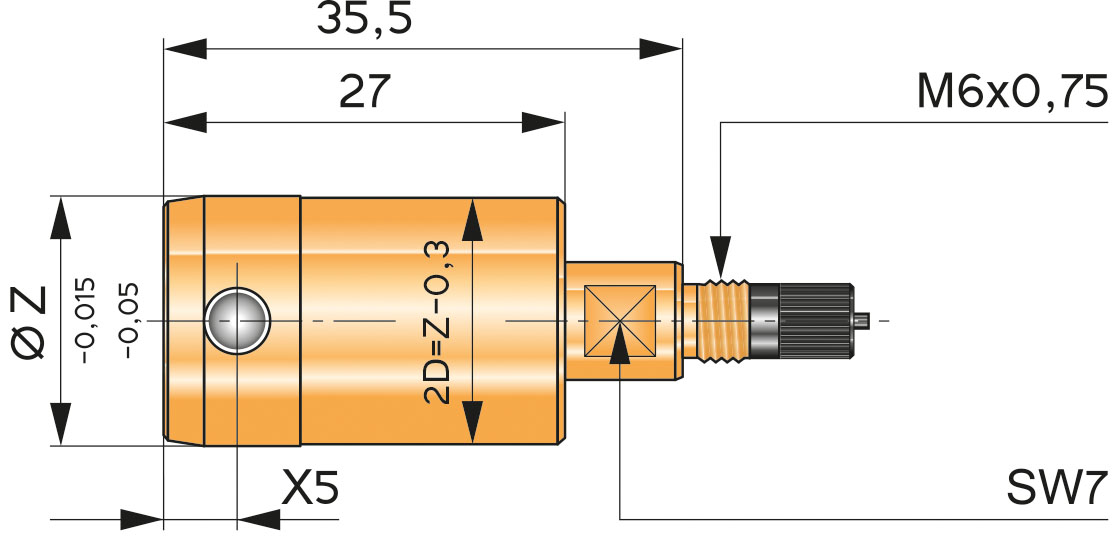
PMK-NO-02-EF-2D · Measuring head for automated meas.
delivered with standard X dimension of 5mm and M6x0.75 thread. Repeat accuracy at IT 8 < 1µ. The measurement range is 0.15mm and can be extended to up to 0.6mm upon request. Self-centering, with insertion chamfer, tapered measuring body prevents sticking. Specify the smallest hole dimension when ordering.
Ordering example: øworkpiece = 18H7 = PMK-NO-02-EF-2D-18
|
PMK-NO-02-EF-2D_10-20mm |
PMK-NO-03-EF-2D · Measuring head for automated meas.
delivered with standard X dimension 6mm and M10x1 thread. Repeat accuracy at IT 8 < 1µ. The measurement range is 0.2mm and can be extended to up to 0.8mm upon request. Self-centering, with insertion chamfer, tapered measuring body prevents sticking. Specify the smallest hole dimension when ordering.
Ordering example: øworkpiece = 38H7 = PMK-NO-03-EF-2D-38
|
PMK-NO-03-EF-2D_15-40mm |
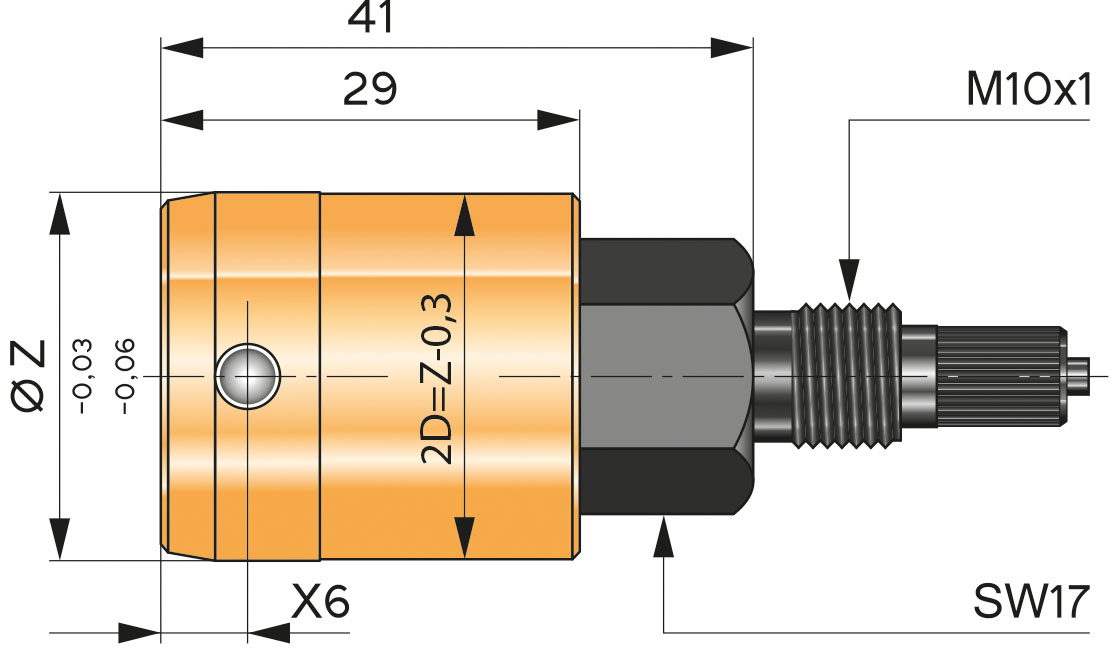 PMK-NO-03-EF-2D_40-50mm |
|
PMK-NO-03-EF-2D_50-280mm |


